Sandy Khuu: Architectural Design 1
Project 1 was our very first project in architecture. Although it is called project 1, its actually a collage of many smaller projects that lead into a a final result which is my design of a tiny house.
Project 1- Word Project

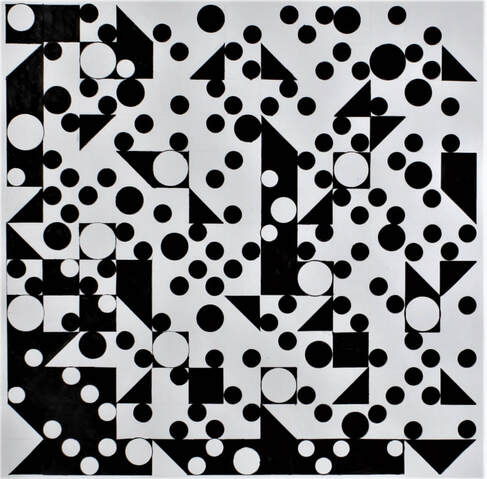
All pictures will give off a certain feel to them. This step of the project allowed to learn about ourselves through artwork, seeing how we interpret certain works of art. Our assignment was to create an artwork that represented a word we were assigned through circles and triangles. What you see now is the final result but behind this result was research about ourselves and art as a whole. This project allowed us to see past all the colors and shapes typically used in an artwork to show feeling by using only black and white and only being able to use circles, triangles, and part of circles and triangles.
We were each assigned a word based on artworks we found that called to us. Based on the artworks I chose, my assigned word was lively meaning full of life, energy, and excitement. With this word, artworks such as The Great Wave and Starry Night was used as inspiration. The maze like and flowing movement from the artworks carried over to the final design which depicts a maze-like image of circles moving around and getting trapped in these random black spaces.
We were each assigned a word based on artworks we found that called to us. Based on the artworks I chose, my assigned word was lively meaning full of life, energy, and excitement. With this word, artworks such as The Great Wave and Starry Night was used as inspiration. The maze like and flowing movement from the artworks carried over to the final design which depicts a maze-like image of circles moving around and getting trapped in these random black spaces.
Project 2: Tiny House Design
This project was to a tiny house for ourselves. It consisted of picking a location for the building, creating the site, and finally designing the house through floor plans and elevation.
City Research
The city chosen for this project is La Jolla in San Diego, California. This place is known for its beach, coves, sandstone prairies, and pine tree trail. This location is also very hilly. Most houses there have the beachy feel and take full advantage of the beautiful weather such as winds, sunlight, and views. This concept carried on into my tiny house design later on.
Design
Based on the location, my priorities were to take advantage of the weather and location, and separate private and personal spaces. This led the design to have many big windows to see the views, to take advantage of the sunlight and beautiful weather of La Jolla, and to reduce electricity use by needing to use less artificial light. Outdoor spaces were also incorporated due to the weather so I added a balcony and patio. For the layout of the house, I wanted to keep my private and public spaces separate so I raised my workroom and bedroom above the rest of the house and added a half-bath for guests so I could have my own bathroom all to myself. I incorporated my word into my design by making my design as open as I can.
My house placement was chosen so my patio would be under the canopy of trees because it is the main view of my site and I like enjoying nature so whenever I want to experience nature's glory, I can just head to my patio.
My house placement was chosen so my patio would be under the canopy of trees because it is the main view of my site and I like enjoying nature so whenever I want to experience nature's glory, I can just head to my patio.
Next was to visualize how my tiny house was going to look like and what materials were going to be used to build it for our elevations. Wood was chosen for this design because I would like my building to be connected to nature so it would blend into the canopy of trees. I needed to decide how the roofs and how tall the house was going to be in this step. I chose to do 8 ft. tall floors because I wanted the house to be cozy but not too short where I would feel cramped. For the roof, flat roofs were chosen to make the house look like a beach house and to not hide the curves of the balcony.

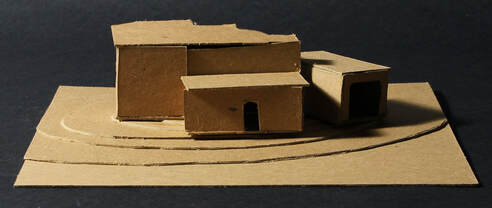
After deciding how the house was going to look like, it was time to build a basic model to see it how the house would look like in 3-D using the floor plan combined with the elevations. Using chipboard, glue, and an exacto knife, I cut out each wall, floor, and roof one by one to get the final result.
Developing the Design
Designs are never perfect and can always be developed. Over time, I understood my design more and improved it. My main development focus was my elevations which have been developed into more detailed ones showing off the beach design more.
| 2102_khuus_site_-model.pdf |
| 2102_khuus_flplan-model.pdf |
| 2102_khuus_elevations1-model_.pdf |
| 2102_khuus_elevations2-model_.pdf |
