Andrew Ritzert: Architectural Design 1
Project 01: Fibonacci Pavilion
|
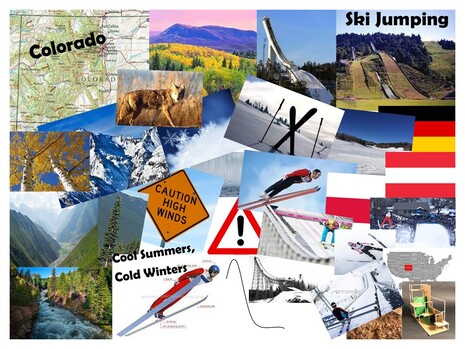
The objective of this project was to create a model based on the Fibonacci sequence an relate it to an Olympic sport of our choosing. My Olympic sport is ski jumping , this is a sport where the jumper goes down a ramp and jumps off, hoping to achieve a greater distance than the opponents. the goal was to be able to look at the contents of the project and see the aspects of the sport. there were different stages of this project, which will be explained in further detail in this page.
|
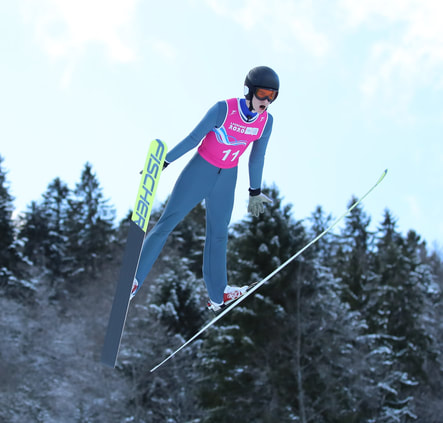
Image from Wikimedia Commons.
|
Research
Project Olympic Sport: Ski Jumping
Word Drawing

|
SOARMaintain height in the air without flapping wings or using engine power.
ASCEND
SAIL GLIDE |
Ski jumping is a sport in which the athlete starts at the top of a ramp and goes down. they then jump of the edge of the ramp and attempt to get the furthest distance out of all the athletes. While researching the sport, I discovered the different techniques that the ski jumpers use. when going down the ramp, they tuck in to get as much speed as possible, when jumping, they perform something called the V-style, where they put their skis in a V and stick their arms behind them. when landing, they perform a telemark landing. When performing this landing, the jumper stagers their sis and holds their arms out for balance as they land.
For my word drawing, I incorporated sharp angles to represent the ski jumping style, and circles to represent the driving force of the jump, or the ramp. The collection of sharp angle have a V-type shape to show the ski jumper. The collection of circles appear to be moving the angular shapes. The curvy section is meant to show the ramp and/or wind, which pushes the jumper forward. The curvy section doesn't appear to be forcefully moving the angular object forward. The angles seem to be floating, or soaring, across the curves.
For my word drawing, I incorporated sharp angles to represent the ski jumping style, and circles to represent the driving force of the jump, or the ramp. The collection of sharp angle have a V-type shape to show the ski jumper. The collection of circles appear to be moving the angular shapes. The curvy section is meant to show the ramp and/or wind, which pushes the jumper forward. The curvy section doesn't appear to be forcefully moving the angular object forward. The angles seem to be floating, or soaring, across the curves.
Olympic Pictogram Studies
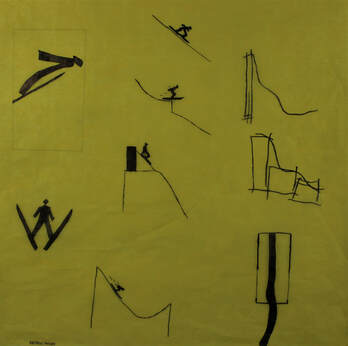
One of the ways Olympic sports are represented is through pictograms. The one in the top left is the official pictogram from the 2022 Winter Olympics in Beijing. All of the pictograms represent the different aspects and forms of ski jumping. The ones in the middle show the different forms a ski jumper uses to go down the hill. The three on the right are the three that led to the design of my model. They show the dimensions and path of ski jumping. Top right shows the height of ski jumping, bottom right shows the length of ski jumping, sand the middle shows decline of the ramp.
Drawings and Model
This section of the project was meant to create a physical representation of the Olympic sport of our choosing. My model is meant to show the dimensions of ski jumping. The large plan shows the height of the ramp, and the long plane shows the length provided by the jump itself. Ski jumping isn't really a jump. The jumper simply soars off the edge of the ramp. This model shows that using the small plane between the two larger planes. it creates a shallow arc between the two extremes, going from tall to long, which is wat happens in ski jumping. The back of the tall plane represent the jumper. In order to stay aerodynamic when jumping, they make their body as flat of possible, like the back of the tall plane.
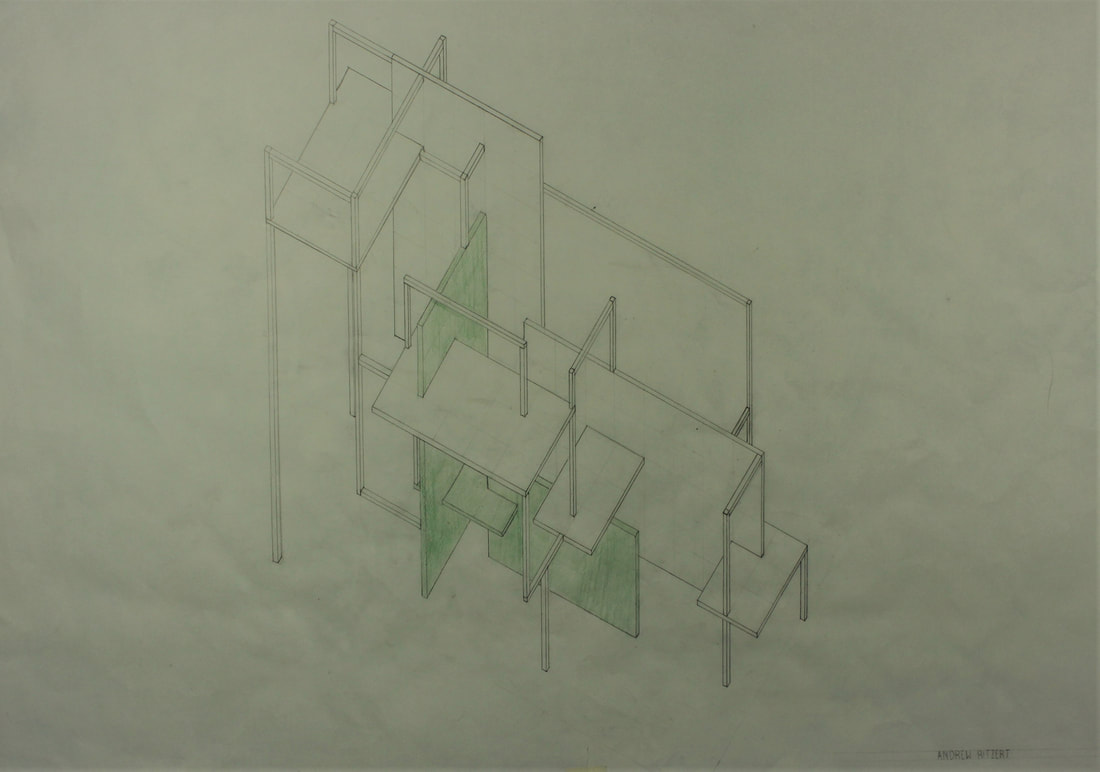
Final Model Paraline Drawing
|
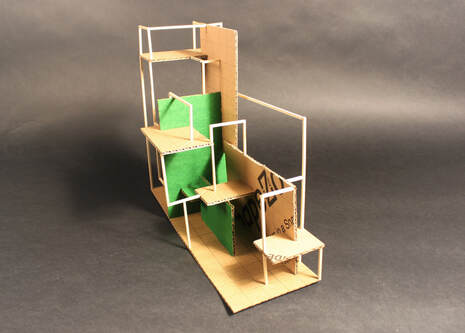
Final Model Design
|
With the final model, the goal was to expand the model while simultaneously linking it to the sport in the same way as the original model. With this model, the focus was still on the height and length. I stacked two tall planes to achieve height, and extended the model using a large plane, which gave the model length. I also added tiers to make the model flow down to the base, with many supports and platforms along the way. A ski jumping ramp typically has a mass of interweaving supports beneath the actual ramp. these are represented by the basswood supports, and the top platform shows the starting point of the jump. The two platforms at the bottom of the model represent the diversity of ski jumping. There is no set finish line. The end depends on the jumper's distance. these two platforms represent the different places where the jump could end.
Final Sketchup Model
Project 02: Olympian House
The objective of this project is to turn our Fibonacci pavilion into a home designed for an Olympian. More specifically, a winter Olympian that practices the sport of our choosing; for me, it is ski jumping. The house must accommodate the Olympian and the design of the house must represent the sport. The house must incorporate our original Fibonacci pavilion and the house must fit into a site that we create.
|
Location Study
|
Site Plan
|
|
|
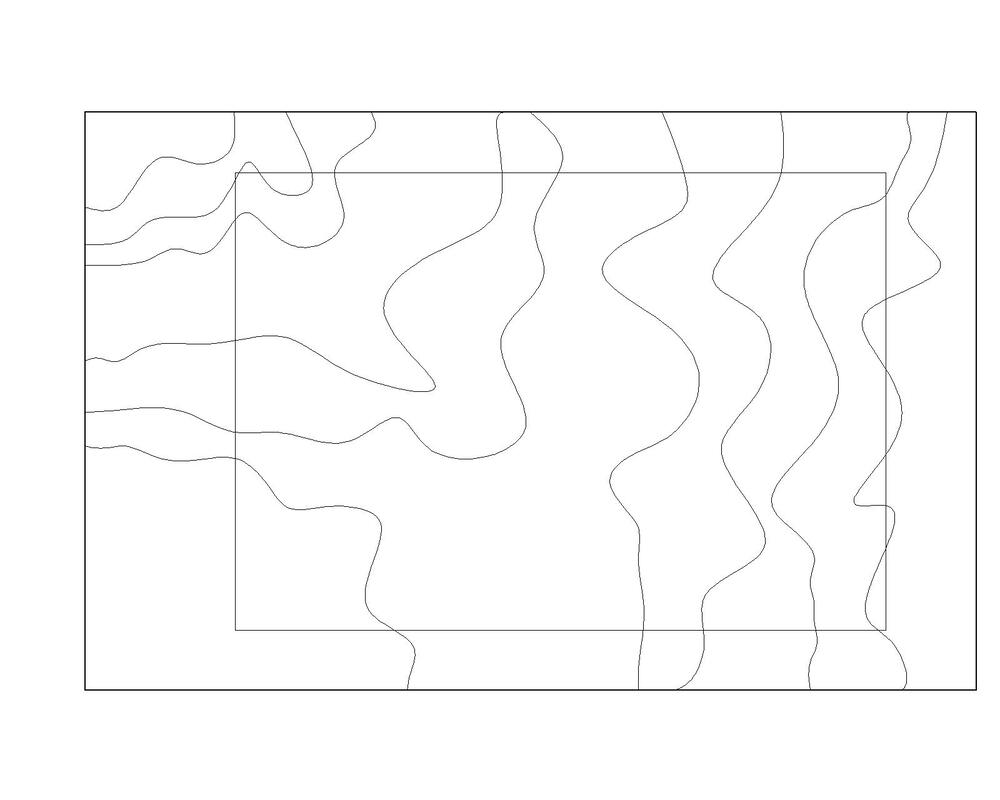
This phase of the project was where we chose our location and site. Colorado was chosen because of the mountains needed for ski jumping and the amount of snow Colorado receives. Colorado also has optimal temperatures. The sites were drawn up blindly and traded around so we didn't know what we would get. we then had to edit our site based on our sport. I added five extra contours and made my site a single hill. The hill starts top left and goes up to the right. The road is off to the right side.
Concept Studies
This phase is where we began to look at building design. We were meant to create four designs and then move forward with our best. My approach to my first three designs was basically the same. My goal was to create a house where the pavilion was the shell of the entire house. They all had the same look, with a taller left section and a smaller, longer right section. My fourth design, however, was completely different,. I took a totally different design approach and created something unique, and creative. The design I went through with was my fourth design concept.
Design Advancements
In this stage, we began looking at the form and space of the chosen design. This is where we began developing basic floor plans and elevations for the home. This allowed me to get a better idea of the size, shape, and space of the house. This is also the phase where I began thinking about the location of the home in the site, and how to access the home. This developed the design of the home even more.
Final Design
The final design of my house looks very similar to its original design. it has a rectangular base with shapes jutting out of it. These shapes come out at angles, and resemble the position of a ski jumper mid-jump. There are two sections that come off the sides of the house, and two more sections that come out of the other protruding elements. the thing that draws the eye is the section that comes of the top of the base and goes up at an angle. this design element incorporates the ski ramp into the design and the angle of the jumper when they come off the ramp. The main residential elements are in the base, and the private living area is at the top of the "tower". The building will be made out of mainly wood, with some concrete for the curved roofs and the floor, roof, and pillars of the tall, protruding element. the angle of the tower flows down like the angle of the hill, so the building feels like it flows down with the hill. The smaller, shorter section sits of a flat area that interrupts the natural hill, which helps with the building flowing with the landscape.
