Welcome to my page! in here you will be able to find some of my sketches, drawings, and projects done during the school year.
First Project:
In our first weeks of architecture we learned about space and form, later on we integrated binaries and verbs in to our sketching and study models in order to inspire us for future projects and experiment with these new binaries and verbs. It helped us learn how to implement these verbs and binaries in to structures helping us create new complex and innovative buildings.
Preliminary Work
Drawing:
Study Models: |
Study Model: |
|
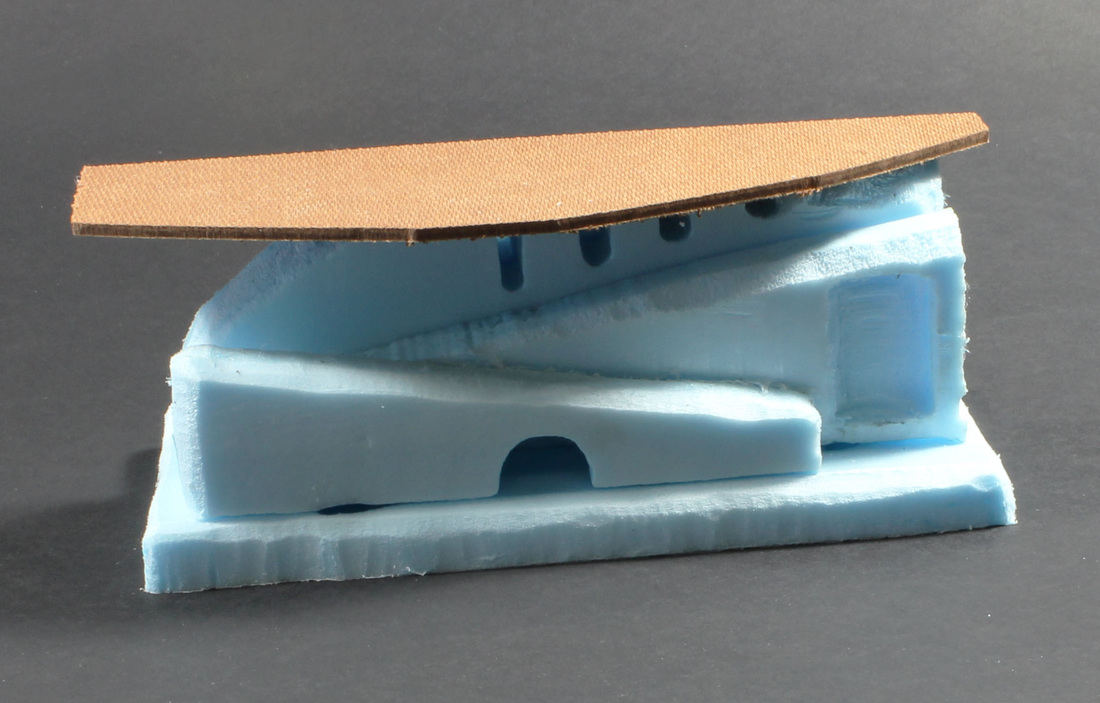
This is my study model that helped me explore Solid/Void and get more ideas for my final model and drawing on the next weeks. It inspire me and gave me more innovative ideas for future projects.
|
First Final Project
Drawing: |
Final Model: |
|
|
|
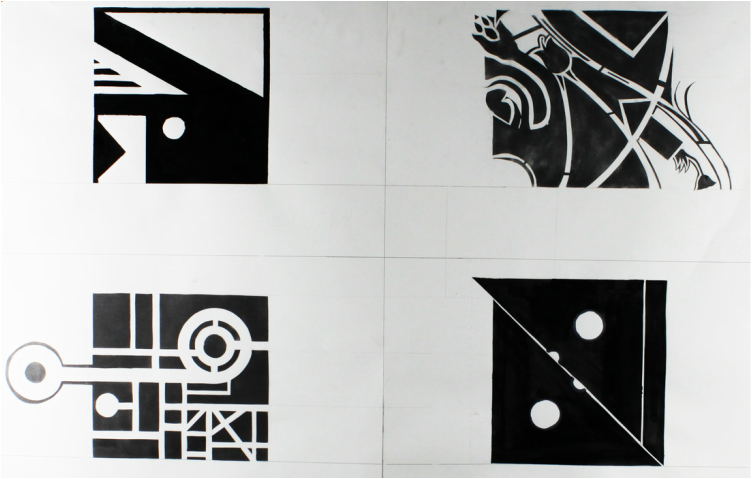
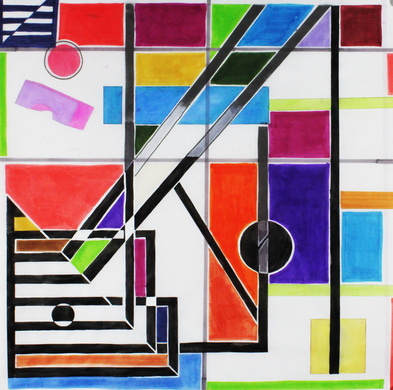
This drawing is based on solid/void.The dark lines and colored spots represent the solid and the white spots represent the void. this drawing helped me develop the final model.
(pictures on the right side) |
This is the final model for our fist project based in solid/void. This model is based in the drawing on the left.
|
Binaries And Verbs
Binaries |
Single |
Multiple |
Form, Space, Order |
Second Project:
In our second project for Advance Architectural Design we were given a client with an assign lot number and we were responsible to make the client satisfied. The building design had to express the client and adjust to the needs of him making the building at the same time sustainable. We had to be able to think outside the box and stop making shoe boxes (My first models). Alot of time, hours of hard work, and taught put into the following models.
Preliminary Work: (Diagrams/Ideas)
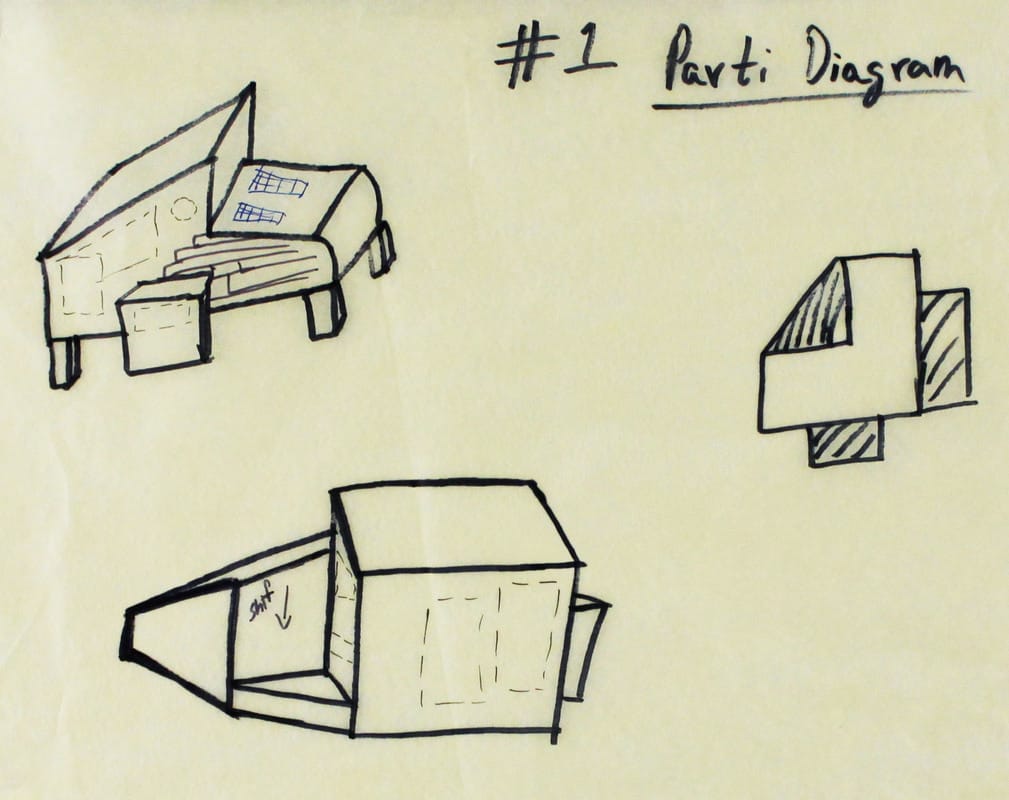
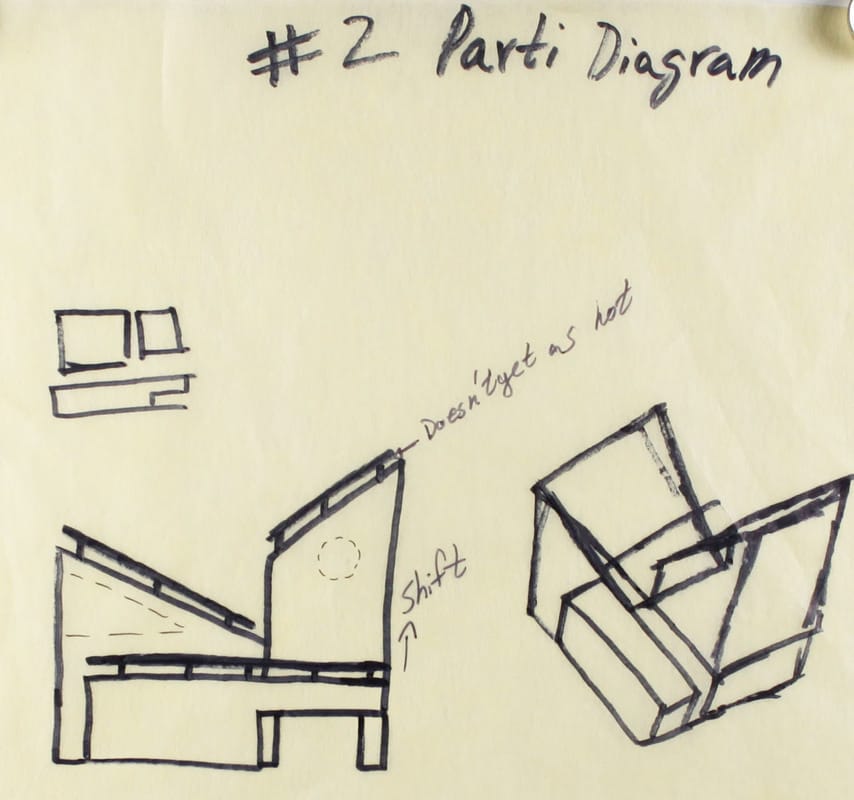
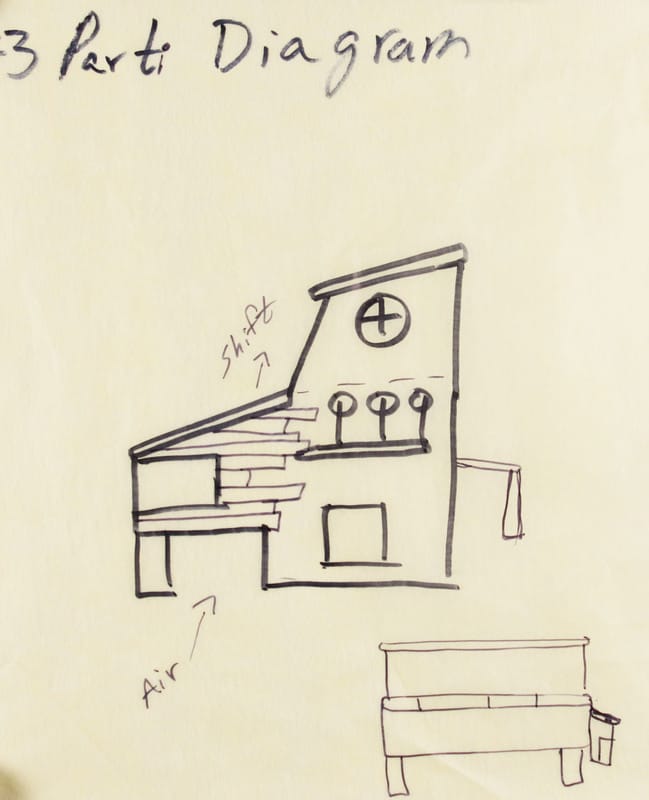
This were my three ideas for my client that I had brainstormed. All of the houses have at least a circled window because my client sees windows as his eyes or camera lences. I taught this was a really important detail to add in around the house. The way the windows are located make an important impact since my client likes patterns and rhythms.
First study model:
This model is my first model idea and is the one I liked the most. I spended more time on it than any of the other models because I really liked the design and paterns. |
Second Study model:
In this model I concentrated in the roof to make it sustainable and make it with a gap between the ceiling in order to keep the heat out.
|
Third Study Model:
This is the model I didn't liked at all and I tried to think outside the box but I never liked it much.
|
Floor Plan Sketch:First floor plan I created for the building and I did it without a ruler or meaturements therefore I was not working.
|
Floor Plan:Second floor plan I created and it has exact meaturements and well organized unlike my first floor plan sketch.
|
#4 Parti Diagram: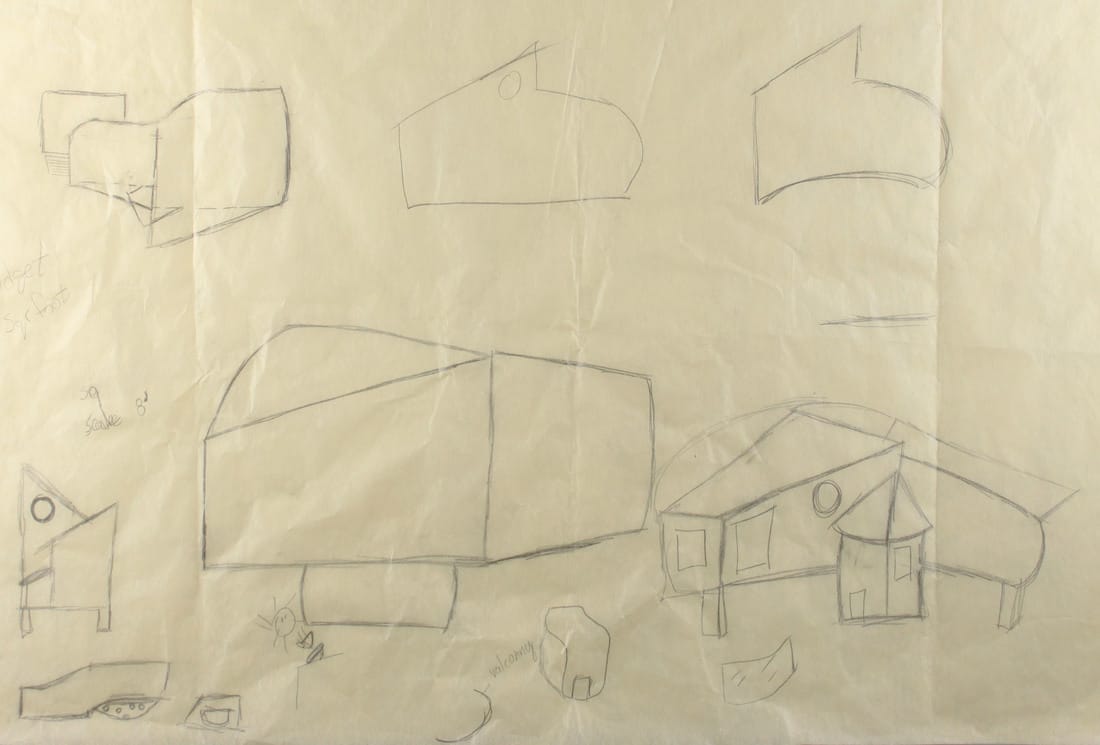
This idea was the spark of everything because I shifted the house and made the shifts of the house really smooth and soft.
|
Fourth study model:
This model was an inovative idea that poped in my head and I tried it on my First study model because it was the one tha i found the most apealing for my client. The idea of this model was to give the house a shift through the middle in order to create two void spaces that eventually they would become baloconies with inside gardens.
This model was an inovative idea that poped in my head and I tried it on my First study model because it was the one tha i found the most apealing for my client. The idea of this model was to give the house a shift through the middle in order to create two void spaces that eventually they would become baloconies with inside gardens.
Sketch Up Model:
Since I had a small lot it was important to take advantage of all the space we had. My lot was 20 feet wide and 60 feet long. My design took most of that space with te exeption that the balconies created a gap for air to flow in and out and created balconies.
3D Printed Model:
The 3D Printed Model gave me a better understanding and made it easier for me to visualize my design completed. Some changes were added like the curved wall at the left side going from the second floor down to the fist floor; I made that curve shorter and it started on the second floor and ended on the second floor.
Fifth study model: |
Sixth study model: |
|
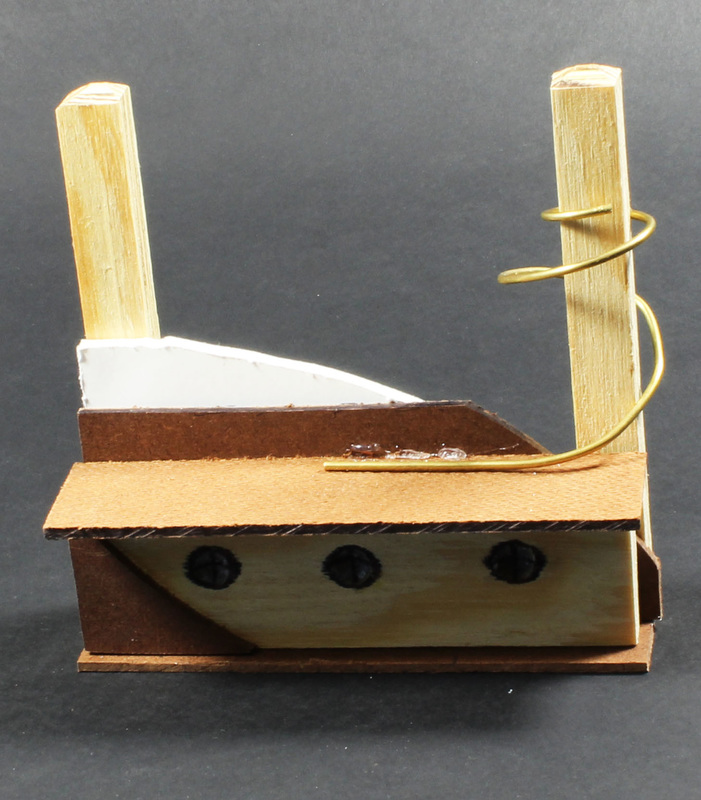
This model was going to be my final product but I personaly didn't liked it and I felt like it didn't looked profetional. I was experimenting with materials like wood, paper, cardboard, metal, and copper.
|
This model was also going to be my final but it broke due to thin cuts on the wood and when I glued it alll together it looked really bad and not presentable. I was also experimenting with the aterials and colors.
|
Second Final Project:
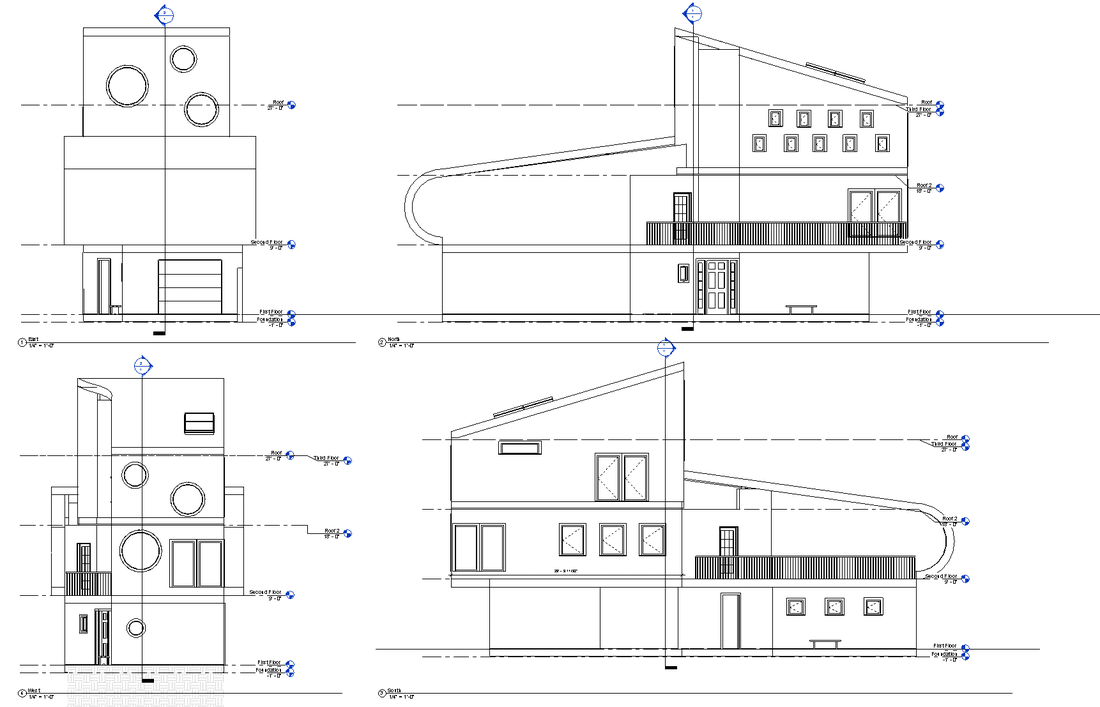
Elevation Plans (Revit):
In this Revit Illustration the four sides of the house are visible in ellevation view.
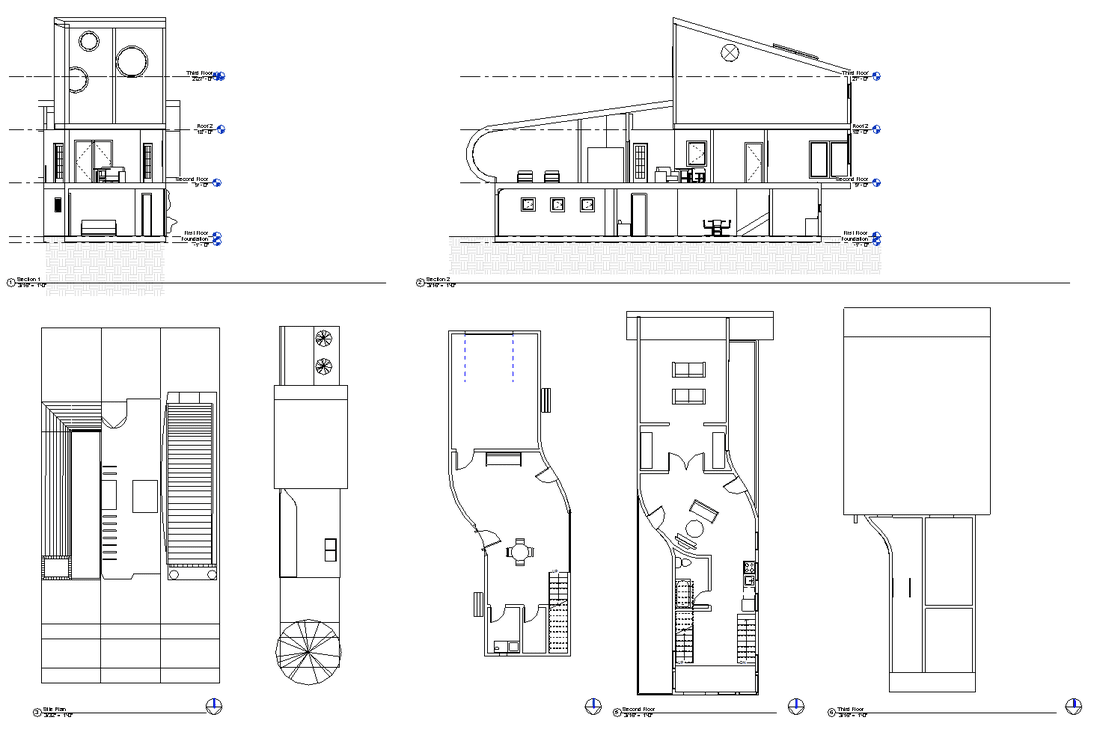
Section Cuts / Floor Plans (Revit):
In this illustration two section cuts of the hause are visible and all 3 of the floorplans with fernature inside as well as the building in the lot.
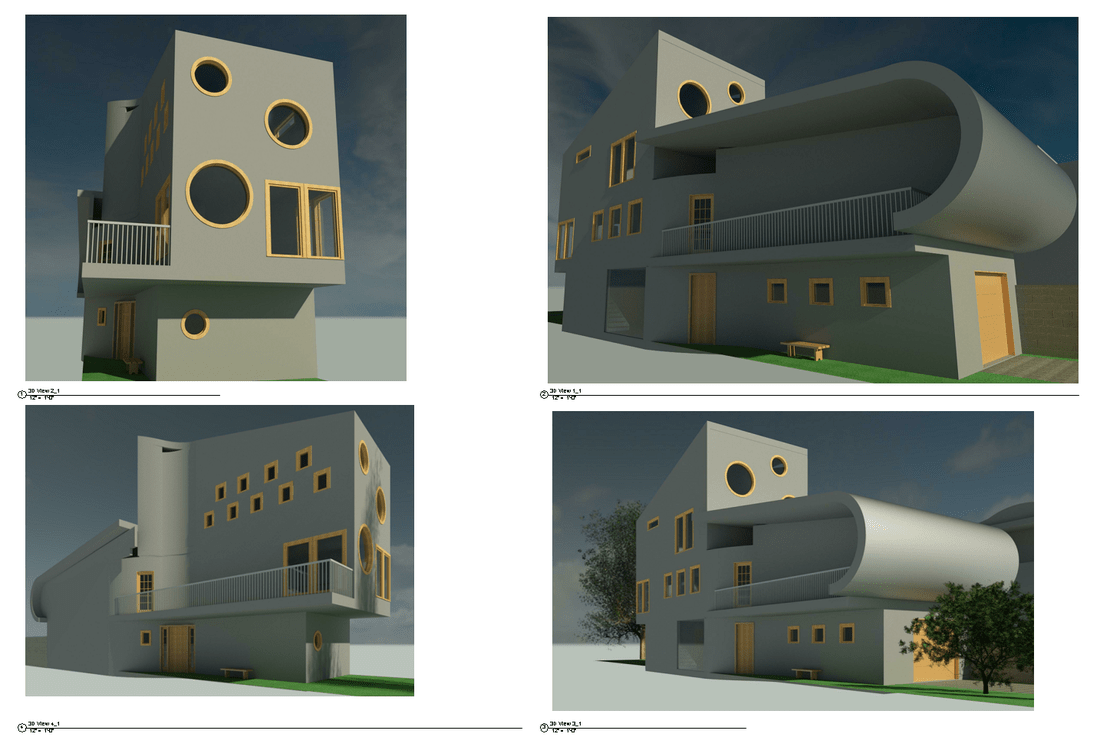
Rendered 3D Views (Revit):
This illustrations offer a more realistic look of the building once is constructed or created
Final Model:
In my final model I tried to make clean cuts with presition and personally I believe it looks presentable for judges. All three floors of the model are removable as well as the roof. In the first floor: Garage, Mudroom and Laundry are found. In the Second floor: Guess Restroom, Theather, Library, Kitchen, and Living Room are found. In the Thrird floor the Master restroom and Master bed are found.
