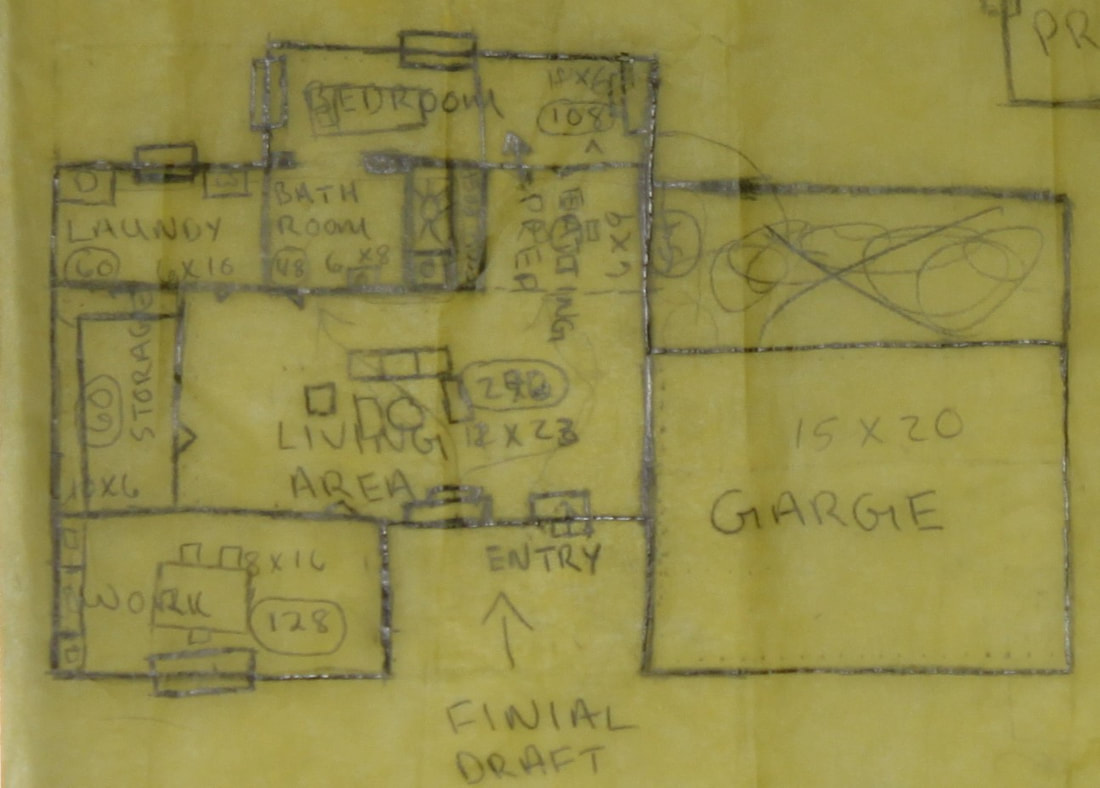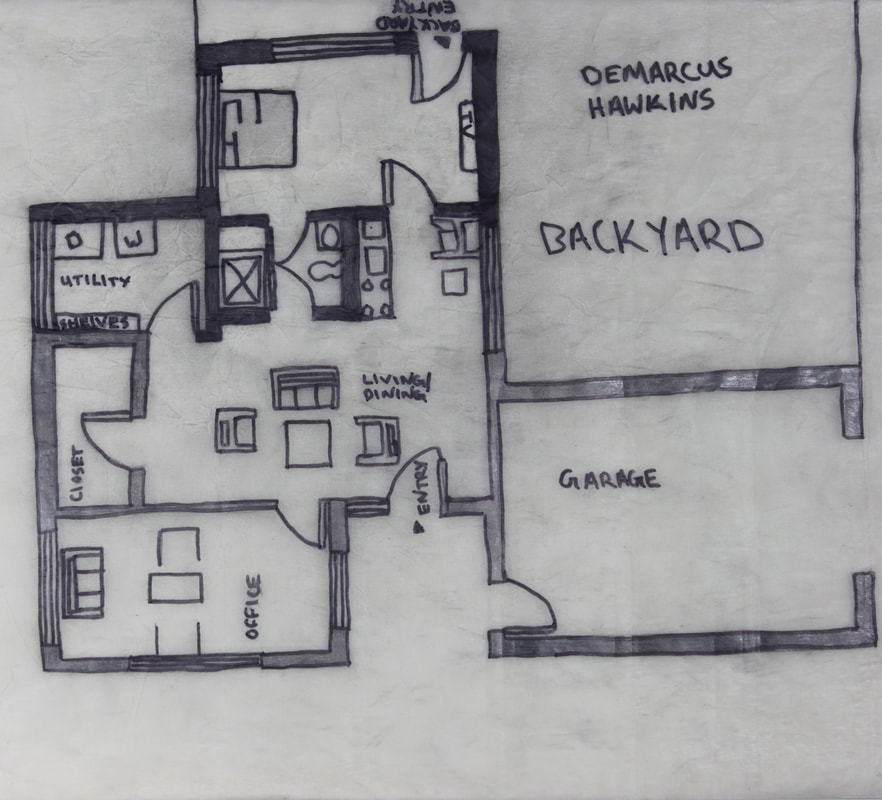
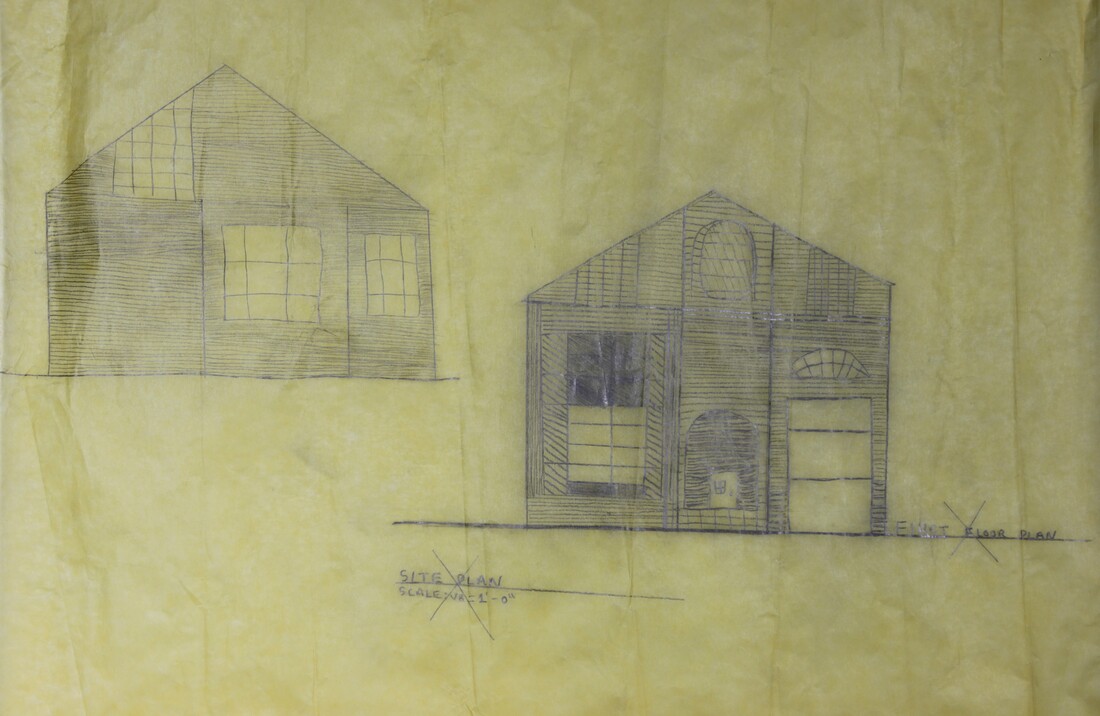
This explain about how the way our floor plan design development is when it is inked and also when it is finish. We add a 1/8 inches walls on the outside of design of our walls placement then when we start to work on the inside that when we starts to add a 1/4 inches walls for our walls thickness so we can find the way the inside is design and place and also where our plumbing walls and walls thickness for the house.
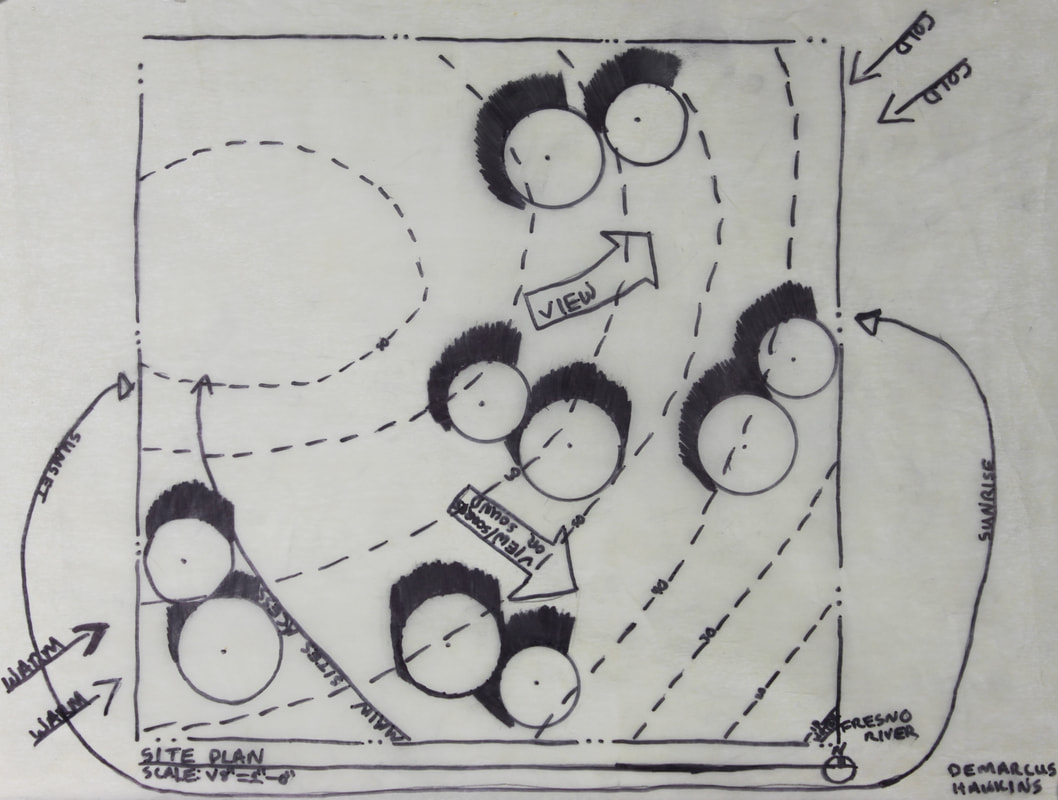
This is what we used after the original copy of the Site Plan we do a retrace over the Site model and then add the inked to the model for the final steps then that when we start adding our building line and our property line into our drawing and add the building of our house inside of the site plan so that of way we know where the building is located and the view of the building so we can add the building line of our drawing.
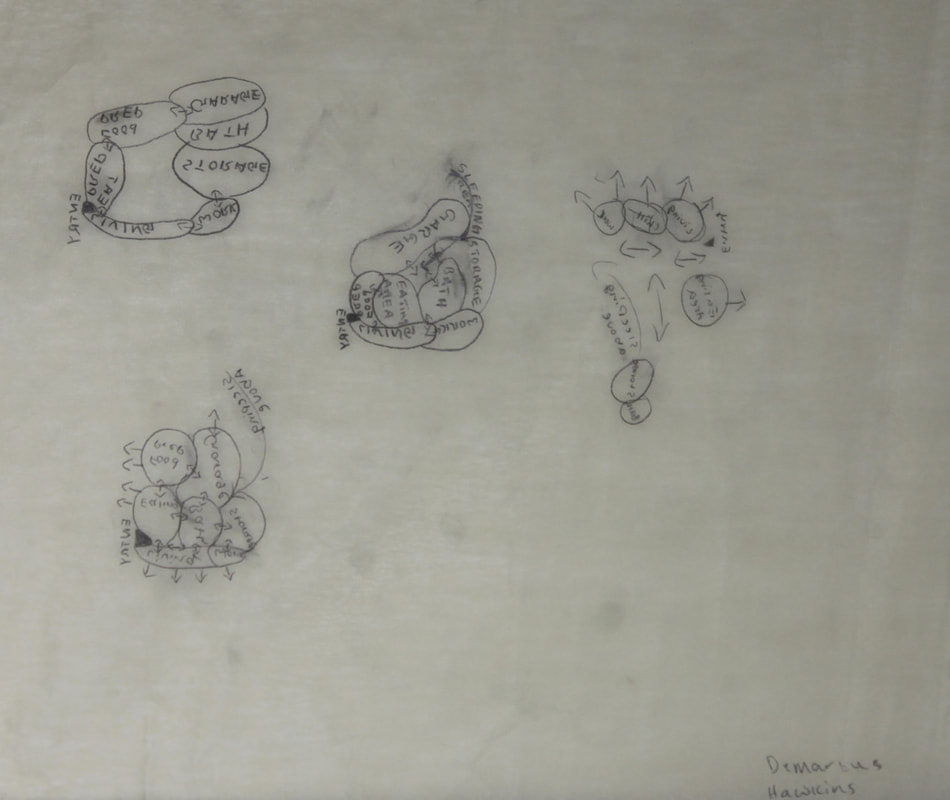
This is called our bubble diagram this what we first started out with after we had got a short summary of we want to do with our floor plan for our house so we used this first before we moved on to the next step of going into our floor plan design. This is what we used first to first learn how to really start a floor plan design so technically this is really our first ever floor plan design.
This is called our Site Plan but I had to redo my Site Plan because the way it is on my floor plan is not the same way it is on my Site so, I had to start all the way over so this is my old rough draft and I am working on the new one but this is why the floor plan is the most important plan because it shows how your building would be for your house.
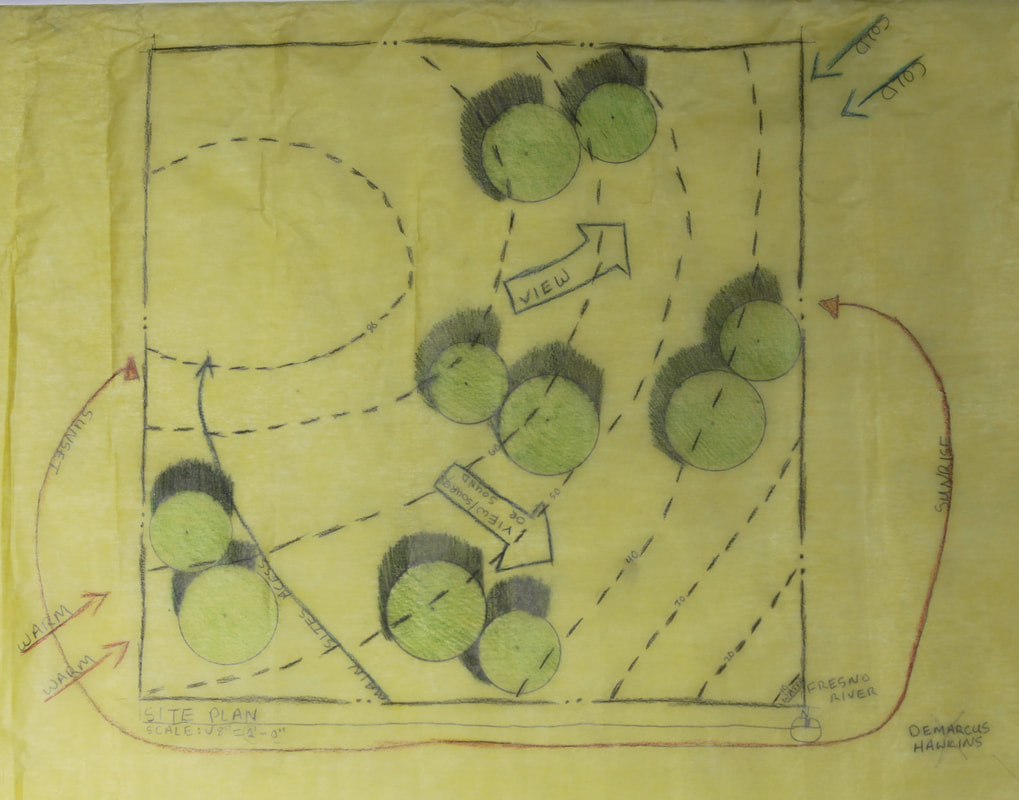
This called our Site plan and this is what we used and retrace and added colors to after we drew the originals copy and this explain where and how would the site plan would be located on the maps and where the house belong and how the water we flow through or where would the building will be it also shows your properly line and the building line for your drawing.